Privacy-conscious internet users might be doing whatever they can to reduce the amount of data tech companies collect about them. Complete user-tracking prevention is impossible, given the plethora of devices, websites, apps, and services we use online every day. But you can take steps to reduce the data you offer websites. With that in mind, iPhone users should ensure they enable certain Safari settings that can help improve privacy and reduce tracking.
Safari is Apple’s internet browser enabled by default on iPhone, iPad, and Mac. You can choose a different internet browser, but Safari remains the go-to for most people, especially on iPhones and iPad.
The following tips apply to using Safari on iPhone, but the same settings are available on the iPad version of the browser. Similarly, the macOS variant of Safari will include similar privacy precautions.
Change the default Safari search engine on iPhone
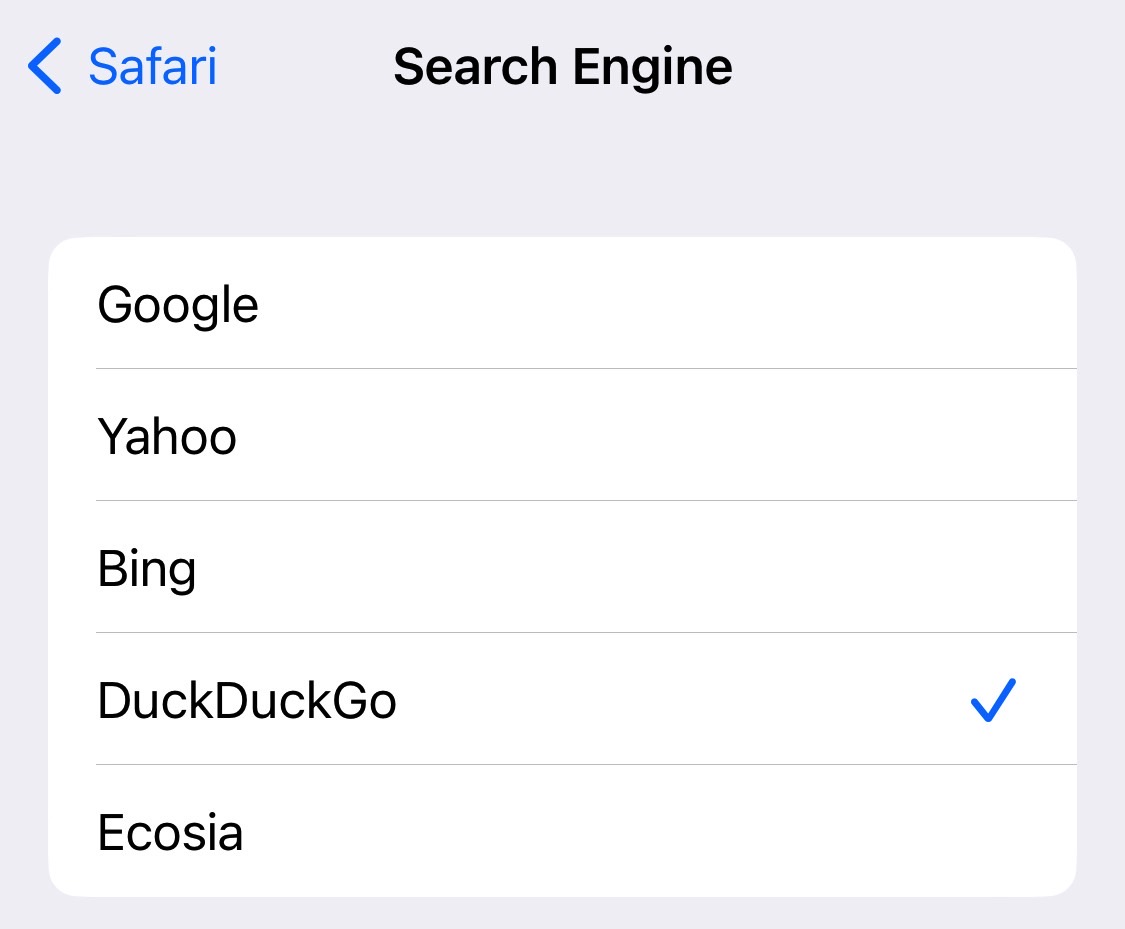
Since Google is one of the main tech companies tracking you online, one way to avoid Google is to stay away from its main product. That’s Google Search, which happens to be the default search engine in Safari on the iPhone. That’s where your Safari privacy quest should start. You should change Google Search for something more privacy friendly, like DuckDuckGo.
Head to the Settings app on iPhone and look for Safari. Then tap the Search Engine option and choose DuckDuckGo from the list.
Tell sites to stop tracking your iPhone
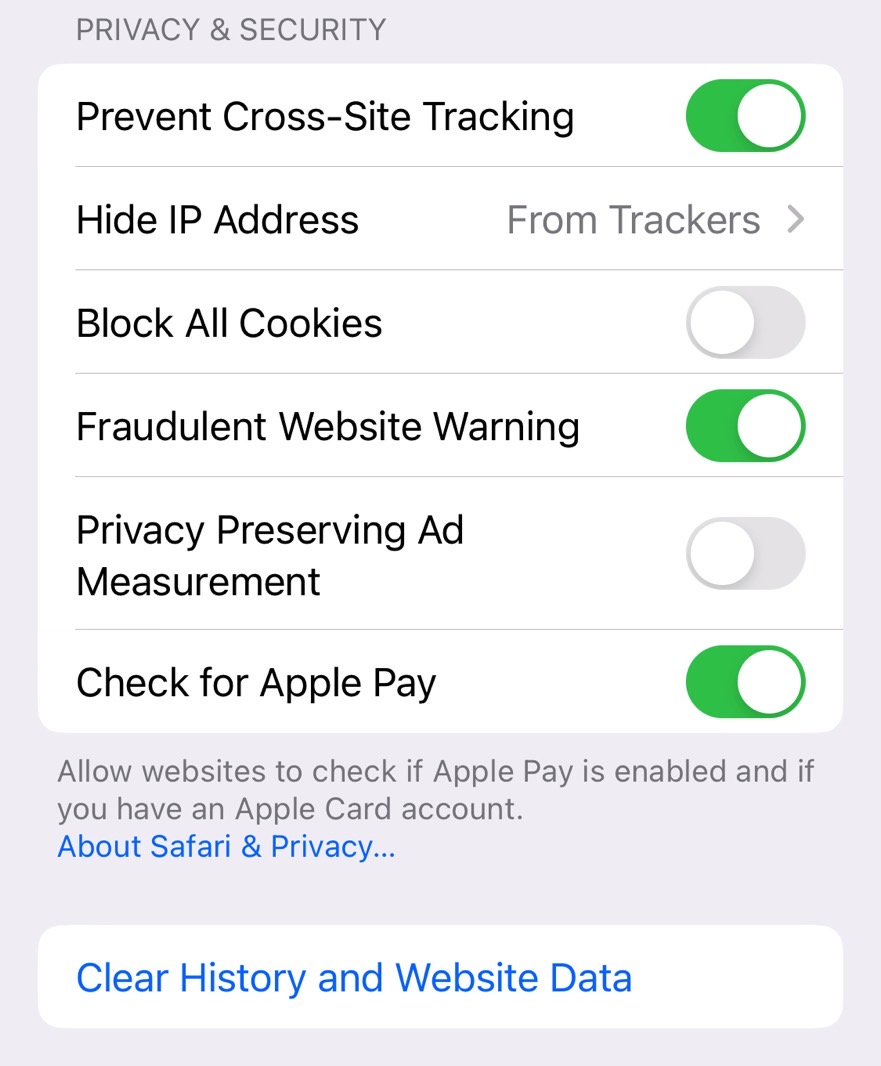
It’s not enough to change search engines in Safari. You should also ask websites not to track your iPhone. To do that, head to the Settings app and look for the Safari menu. You’ll want to enable the Prevent Cross-Site Tracking option.
The feature will not prevent all tracking. But combined with the other steps in this post, it can reduce it.
Block cookies in Safari
While in the menu above, you might also want to enable the Block All Cookies option. That’s how advertising firms keep track of users. Blocking cookies might impact some site functionality, however.
Furthermore, you should not accept any ad-related cookies whenever websites ask you to do it. That’s if you don’t block all cookies. Only the functional cookies should remain enabled in that case.
Finally, the menu above also lets you block the Privacy Preserving Ad Measurement if you want further peace of mind.
But it’s not enough that you’ve blocked cookies. Also, make sure you tap the Clear History and Website Data if you want to start fresh. You can repeat this process in Safari as many times as you wish.
Hide your IP address
Your quest to improve privacy while browsing the web with Safari on iPhone isn’t done. There are a few key settings that you can still tweak. Like hiding your IP address.
Again, Settings is the app where you need to be. Look for Safari and then the Privacy & Security section. The Hide IP Address will let you choose the From Trackers option.
Block location access
Location. Location. Location. That’s a critical privacy aspect when it comes to your iPhone experience. That includes apps and internet browsing via Safari.
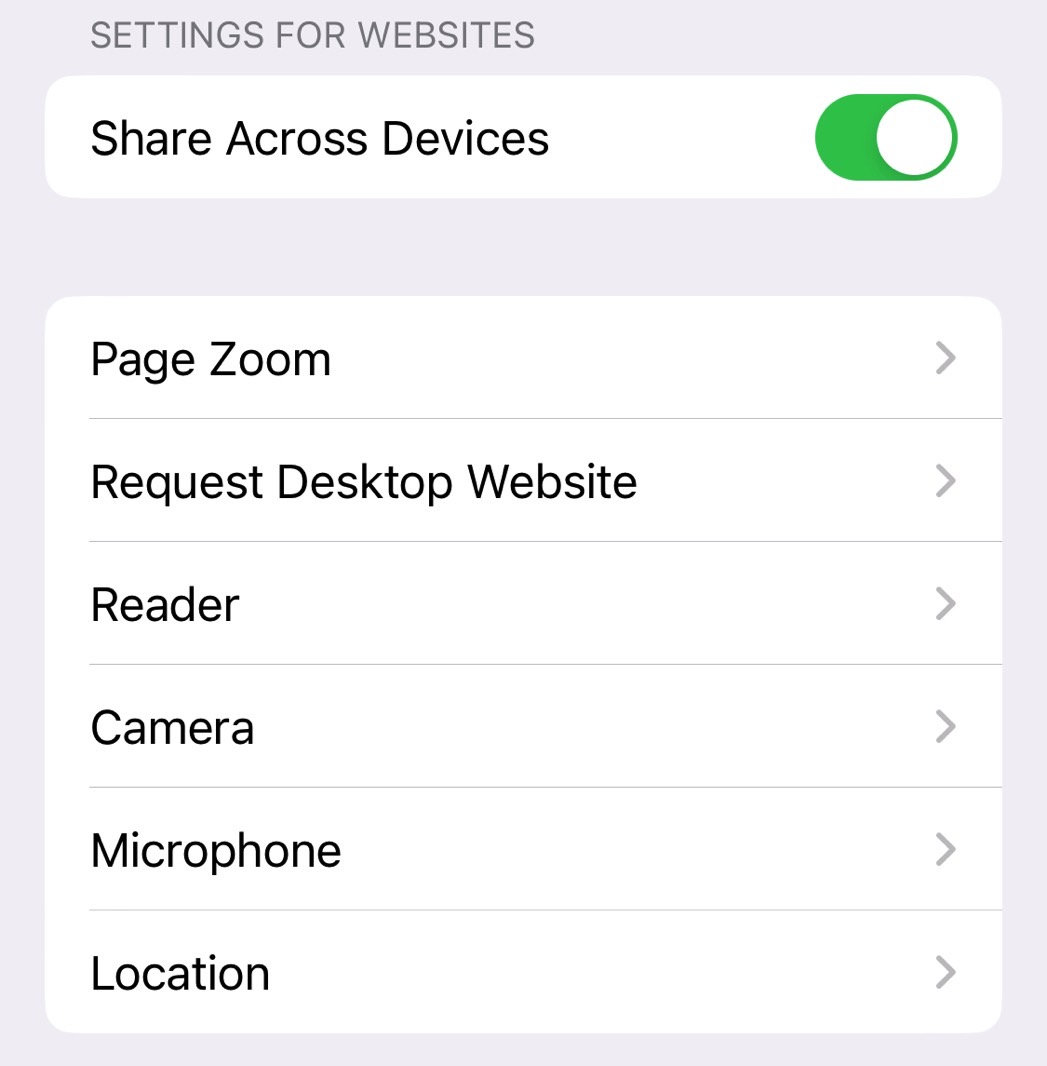
Turning off location tracking in Safari might stop some websites from recording your location. Again, we’re heading to the Safari section of the Settings app. Go to the Settings for Websites section and look for the Location menu.
You can set it to Deny if you don’t need location-related internet services. The Ask option will force websites to ask whenever they want to track your location. You might have certain favorites that you want to allow to track your location.
The same Safari settings section allows you to block sites from using your iPhone’s microphone or camera.
Bonus: Browse the web on iPhone in Safari’s private mode
You can use a combination of the features above, or all of them, to improve your internet privacy on iPhone. You can also enable the Share Across Devices option if you own multiple Apple devices, so the same settings apply to various iPhones and iPads.
If you want to add another layer of anonymity, you can also go for a more radical change for browsing the web on your iPhone. You can always surf the web on Safari in a private window.
This isn’t a setting, so you’ll have to open the Safari app. Look for the tabs symbol in the lower right corner and tap it.

Next, tap the + symbol and choose Private from the dropdown menu (the downward arrow). Your Safari browsing experience will stay on Private until you switch back.
The downside is that the sites you browse in private mode won’t remain in your history. You’ll have to balance between Private mode and regular mode depending on which websites you use.
A helpful trick lets you determine whether you’re in Private or regular mode. Look for the color of the URL bar, where you search the web or input web page addresses.
If it’s dark, you’re in Private mode.
More Apple coverage: For more Apple news, visit our iPhone 14 guide.

